If you use both Microsoft Outlook and an iPhone, you may have two separate sets of contacts on each platform. That’s a hassle, especially if the contacts are virtually the same across the board. Instead of trying to maintain each list, your best bet is to synchronize the two lists, so any changes you make in one are propagated to the other. To achieve that goal, you can turn to a few different options.
Jump to:
- Exchange synchronization
- iTunes synchronization
- iCloud for Windows synchronization
- Third-party synchronization
What you’ll need
- iPhone
- Windows computer
1. Exchange synchronization
If you or your organization uses Microsoft Exchange for your mail server, you can sync your contacts between Outlook and your iPhone.
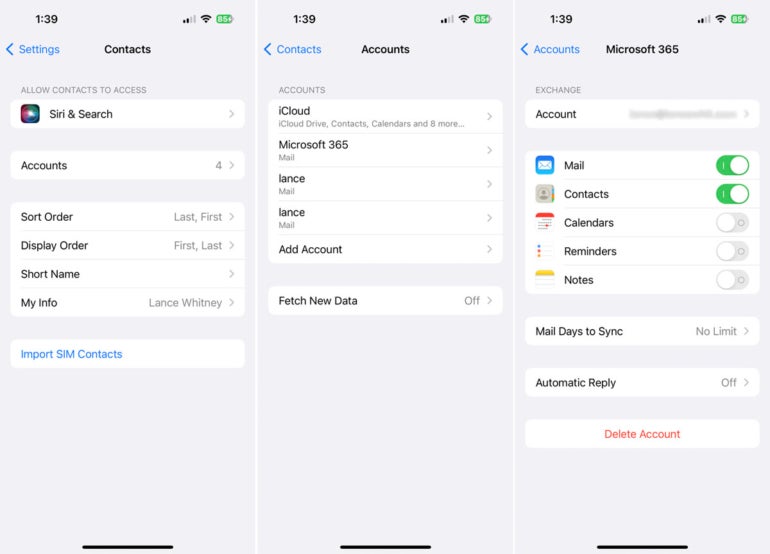
1. From your phone, go to Settings, then select Contacts.
2. Tap the entry for Accounts, and then select your Exchange or Microsoft 365 account.
3. Turn on the switch for Contacts (Figure A).
Figure A
4. Check your contacts in Outlook and on your iPhone to confirm that they’re in sync.
2. iTunes synchronization
If you don’t use Exchange, then iTunes is a second option. The downside is that iTunes is a resource-intensive and sometimes buggy program, and your organization may not allow or support its use. Apple has also vowed to deprecate the Outlook synchronization for a future version.
SEE: Learn how to use multiple Apple IDs on the same Mac.
But for now, the syncing continues to work, so it’s still a possible option, especially for a home or personal computer. To download and install iTunes on your Windows PC, browse through Apple’s support document, “Download and Use iTunes for Windows.” From there:
1. Connect your iPhone to your PC.
2. Open iTunes, then click the icon for your phone.
3. Under Settings, select the option for Info.
4. Check the box for Sync Contacts With, and change the source to Outlook.
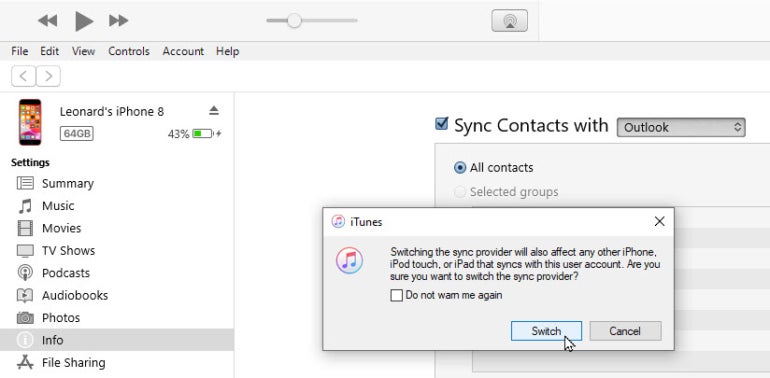
5. If a message appears confirming that you want to switch the sync provider, click the Switch button (Figure B).
Figure B
6. If you maintain more than one contact group, click the box for Selected Groups and choose a specific group.
7. Otherwise, keep the selection set to All Contacts.
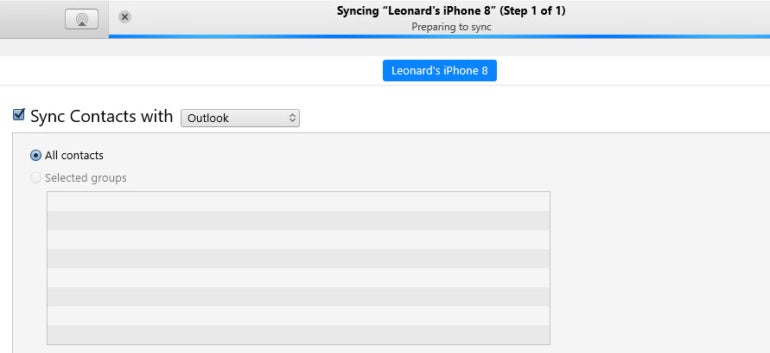
8. Click the Apply or Sync button at the bottom to synchronize your contacts (Figure C).
Figure C
3. iCloud for Windows synchronization
A third option is to use iCloud for Windows.
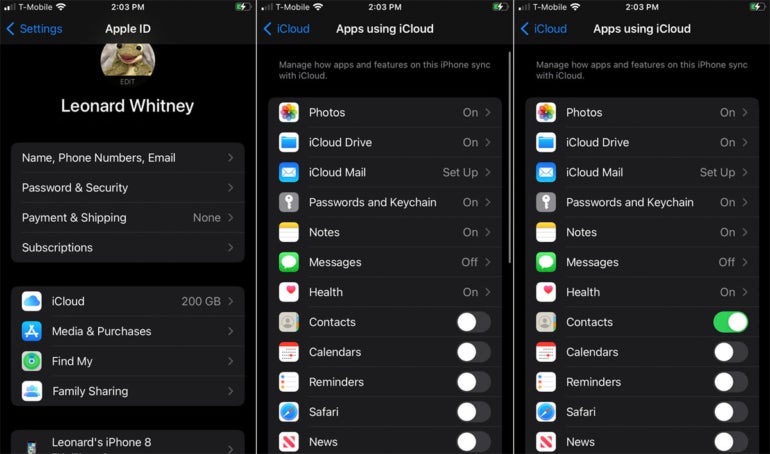
1. On your iPhone, go to Settings and tap your name at the top of the screen.
2. At your Apple ID screen, tap the entry for iCloud.
3. At the iCloud screen, turn on the switch for Contacts (Figure D).
Figure D
4. Next, you’ll need to get iCloud for Windows, which is available as a universal app from Microsoft.
5. After installation, click the Start button, then click the iCloud shortcut in the Apps list.
6. After you open the iCloud app, sign in with your Apple ID and password.
7. At the iCloud window, check the box for Contacts and Calendars with Outlook. Click Apply (Figure E).
Figure E
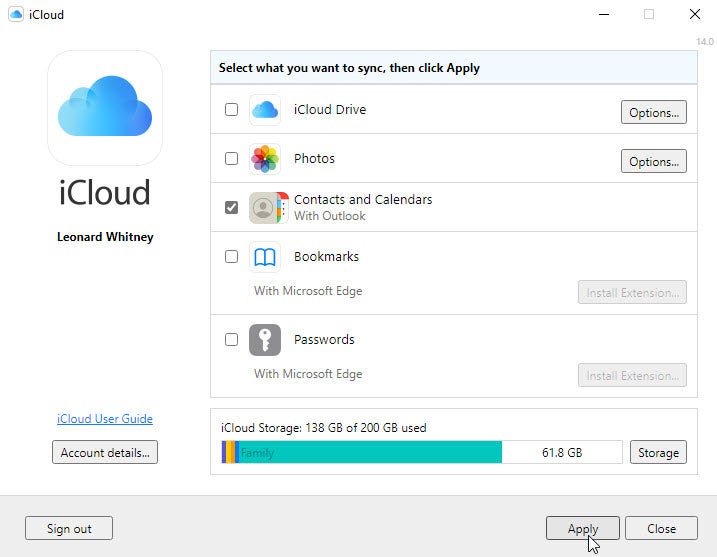
In the past, the iCloud for Windows app allowed you to pick which items you wanted to sync with iCloud. You could opt to sync your contacts but not your calendar or vice versa. That capability is no longer available with iCloud for Windows. If you go this route, the app now automatically syncs your contacts and calendar events.
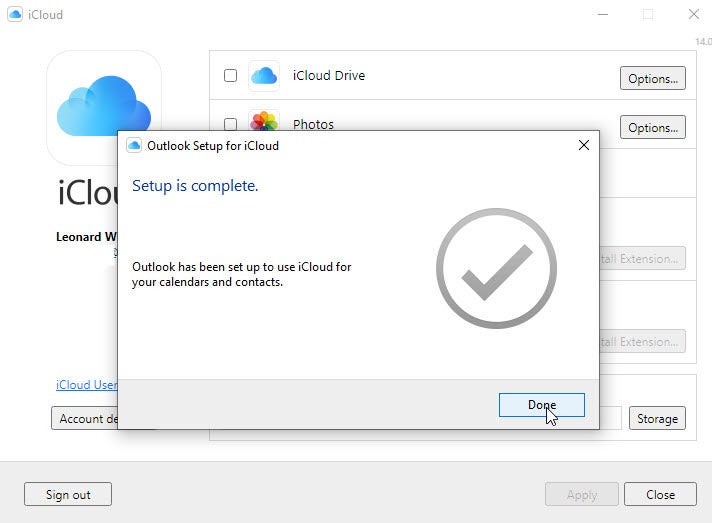
8. If you proceed, the setup kicks off. After it is complete, a notification tells you that Outlook has been set up to use iCloud for your calendars and contacts.
9. Click Done, then close the iCloud for Windows app (Figure F).
Figure F
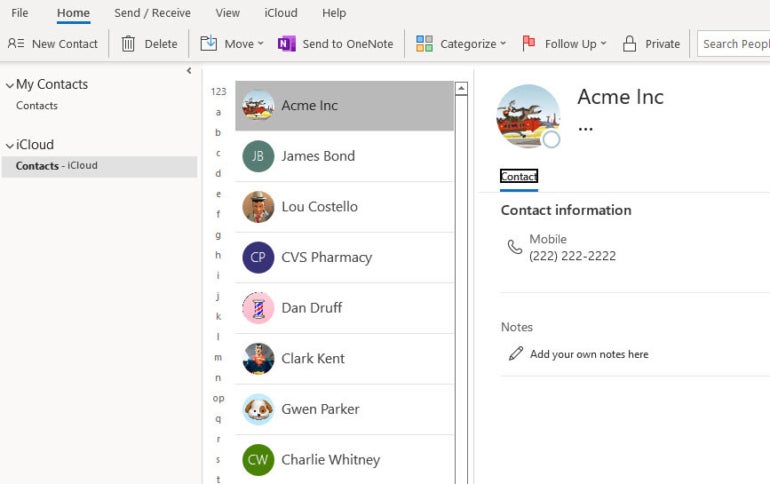
10. Open Outlook and click the Contacts icon.
11. You’ll now find a contact list for iCloud that will remain in sync between Outlook and your iPhone (Figure G).
Figure G
4. Third-party synchronization
If you can’t or don’t want to use any of the above methods to sync your contacts, one other option is to use a third-party program.
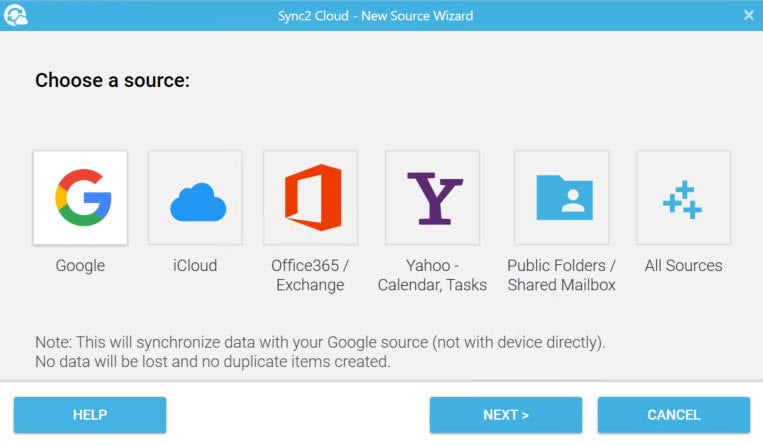
One such product is Sync2 Cloud from 4Team, which normally costs $49.95 for a single license for the full version. With this utility, you can sync your contacts among iOS and iPadOS, Exchange, iCloud, Google and other cloud-based services (Figure H).
Figure H
